
Weeks ago, I promised a "tu-tu"orial here on The Jaunts. Well, life has caught up to me, after being busy with Easter, and a sick kiddo and various other pop-ups I have FINALLY finished it! :) So... Here you go.

I've always said that when I have a little girl, she will dress up in tutus Every. Single. Day. I love tutus on little girls, and so I am in HEAVEN that they are so popular right now! :) I was thinking about how dang easy it is to make a tutu, and was going to whip up a few... and onsies with tutus sewn on are just the cutest... ever.
So, I made little tutu onsies for every day of the week with a line from the "Monday's Child" Mother Goose Nursery Rhyme.
Monday's child is fare of face,
Tuesday's Child is full of grace,
Wednesday's Child is full of woe,
Thursday's Child has far to go,
Friday's Child is loving and giving,
Saturday's Child works hard for a living,
but the child who is born on the Sabbath Day,
Is bonny and blithe and good and gay.
Well.... I didn't want those EXACT lines on my sweet girl's tutu onsie! (Who wants to put that their child is full of woe on their shirt!?) So I changed them up a bit, and made up my own version:
Monday's Child is full of grace, Tuesday's Child has a pretty face,
Wednesday's child has no woe,
Thursday's child has lots to grow,
Friday's child is loving and giving,
Saturday's child plays hard for a living,
Sunday's Child is fair and wise.
For these tutus, I didn't like the idea of having elastic around her waist, and I wanted them to still be comfortable enough that when she is lying down (and lets face it, babies lie on their backs stomachs a whole bunch!) that she does not have uncomfortable knots on her back/tummy. When your tutu is done, you can press your hand on the inside of the tutu and feel that it will be pretty comfy for your little girl to wear.
This really is an easy thing to do, and you can make one single onsie, or a whole mess of them. Plus, you don't even have to pull out a sewing machine. I think this is also a cute way to personalize a baby shower gift, just print off an initial of your recipient's little girl, flip it on the computer and print it on your iron-on transfer sheet and follow the same directions. I'm sure it would be a very welcomed gift, plus hold a special place in momma's heart because it was personalized from YOU! :)
If you can make a single stitch and tie a knot, you can make these onsies!
So. First off, you are going to need:
 7 spools of Tulle. I got mine from the craft store's wedding section.
7 white onsies in the size you need
1 spool of white thread
1 hand-needle
1 12 inch ruler
Iron-On fabric transfer sheet
Iron
Scissors
Fabric Marker
You will also need to download the PDF that I made for the Iron-On transfer sheets. You can do that here:
Monday's Child Poem Onsies PDF File or make one of your own. Just remember to print them off in a flipped (or mirrored) image so it looks backwards on the page when its all printed on the transfer paper. Otherwise, it will look backwards on your onsie once it is ironed on!
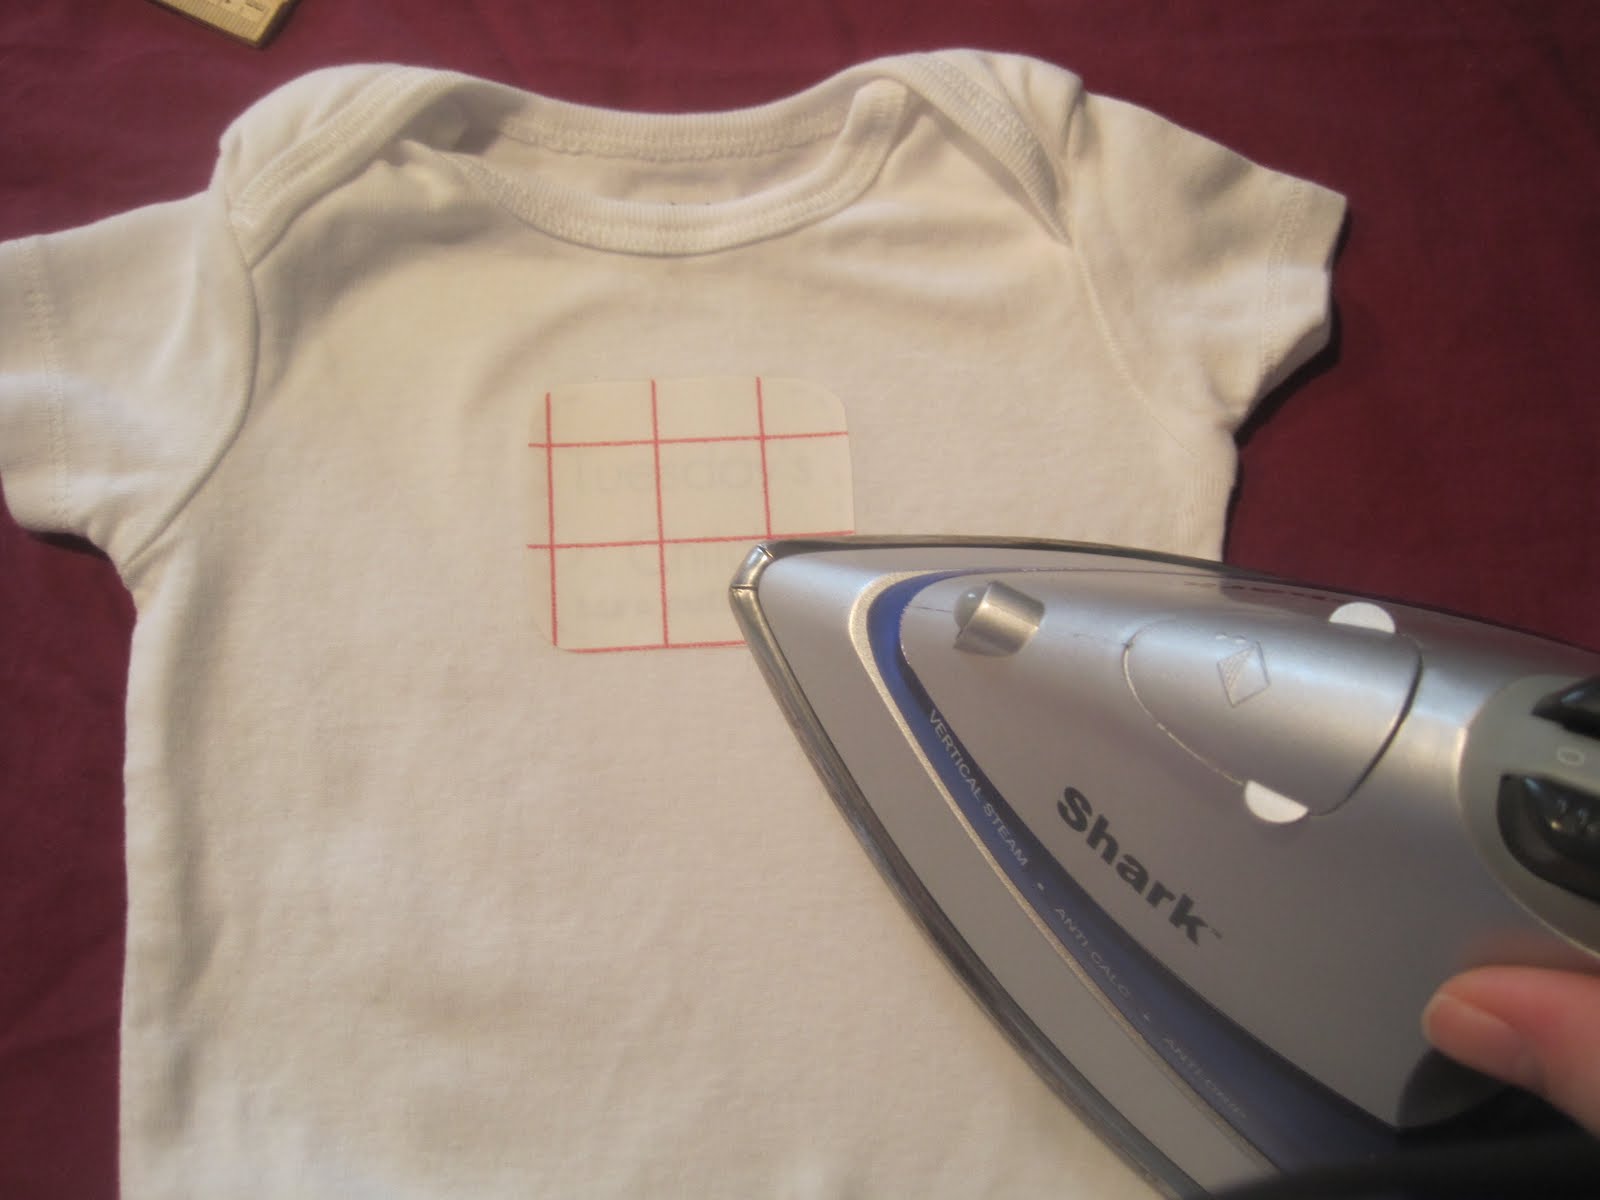
Once you have all of your supplies, print off your iron-on transfer sheet (again, you can do that here.) and cut out your transfers. Make sure to read the directions on your transfer paper and allow for the appropriate edge around where you are cutting.


Following the directions for the transfer sheets, iron on the transfer paper to the onsie front, making sure that it is centered. I folded mine in half, then marked the middle with the fabric marker, centered the iron-on, and then ironed on high dry heat.


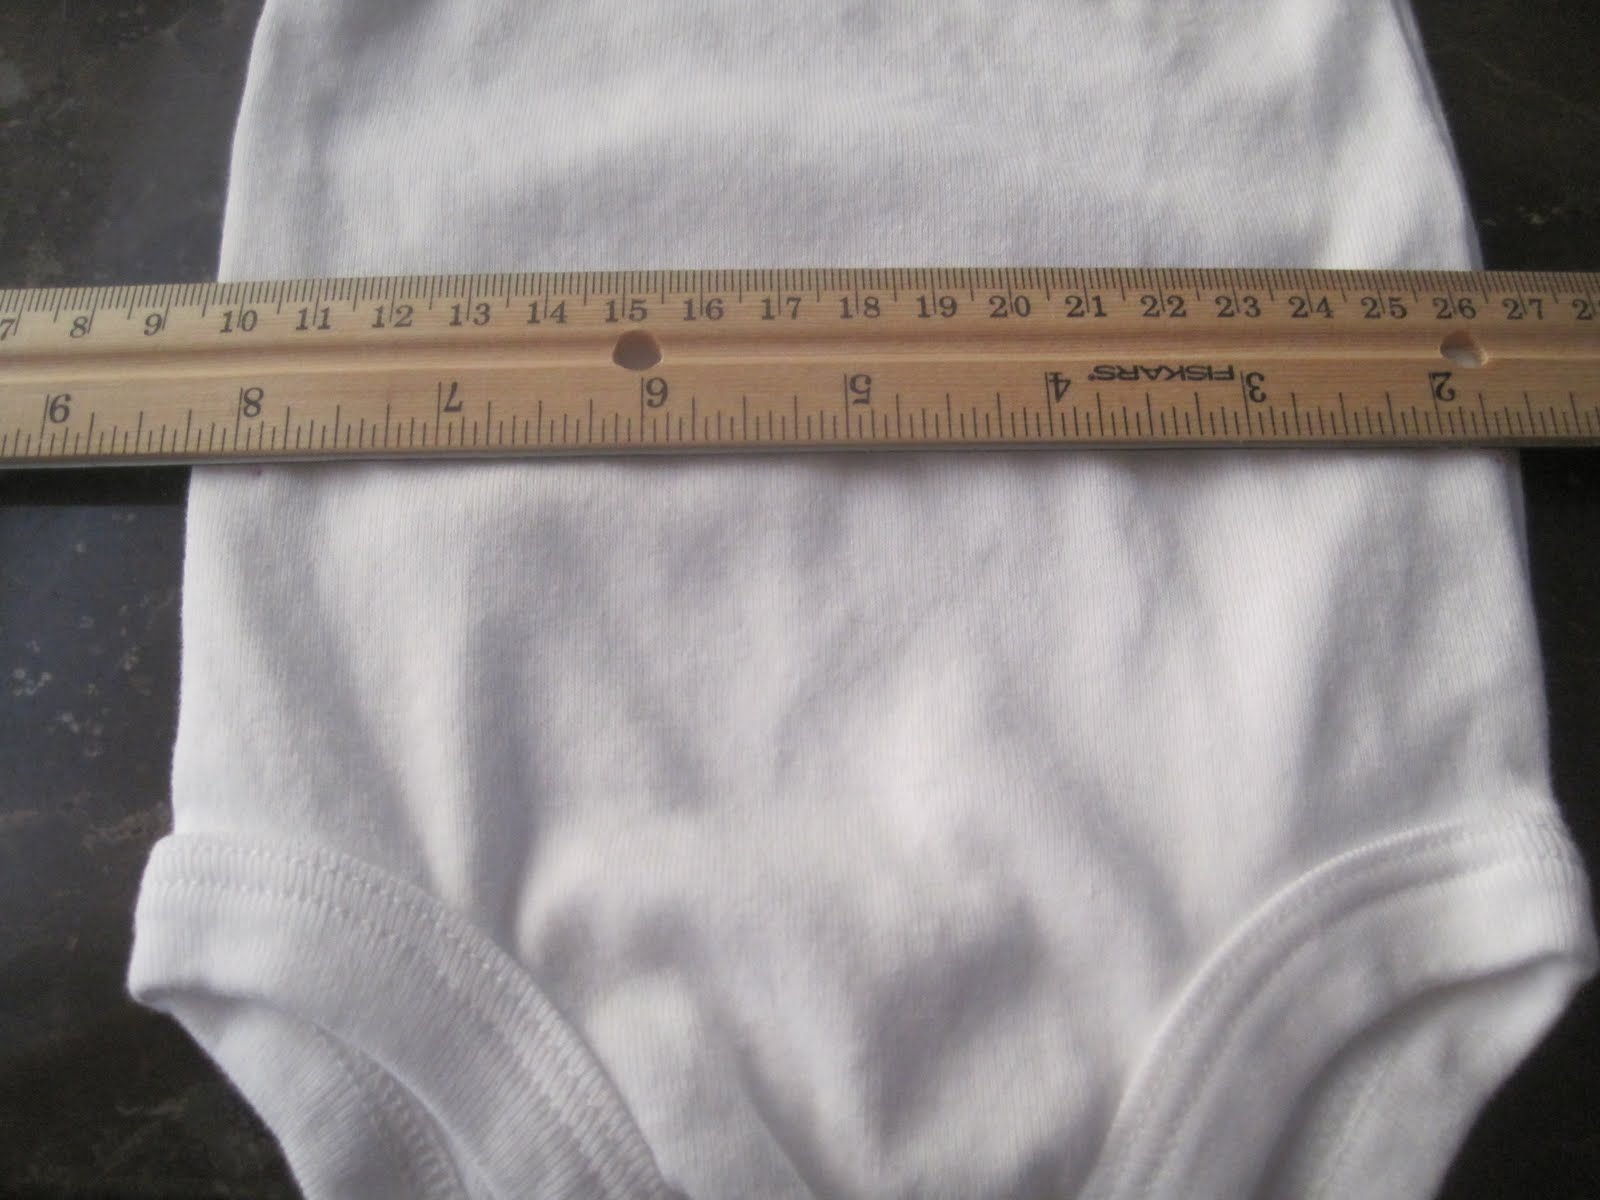
Once your onsies are all finished and have the transfer on the fronts, use your ruler to measure up 2 " from the waist of the onsie leg, about where your baby girl's diaper line will be. Then make little dots all across the onsie for guidance when you are sewing on the tutu.


Next, you need to measure out many many many many many feet of tulle! I used my ruler and wrapped the tulle around it over and over again (almost using up the whole roll of tulle, I probably use between 50-70 feet of tulle for each onsie. Don't worry, there are 25 yards of tulle on each spool. You will even have some extra for some matching headbands if you wanted!) until you have a good "chunk" of the tulle rolled onto the ruler. Then snip both ends so you have many, many, 12-inch sections.


No, you could just fold each section in half, but I prefer to fold the tulle diagonally first and then find the middle to sew on. It makes for a bit fuller of a tutu. Find the middle of your tulle section, pinch, and sew onto your onsie by putting your needle through the fabric from the underside, looping it around the middle of your tulle, and then sending your needle back to the inside of your onsie.


Then knot it off and snip off the excess thread. This part is very time consuming to knot each one. BUT, by knotting off each one vs. sewing them all on in a big row makes it so the onsies keep their horizontal stretch, so they will wear longer.

Repeat again and again until your onsie is full of tulle all the way around!


Then, repeat for all seven onsies to have a complete set. When done, your little girl will be able to wear a onsie EVERY day of the week! :)

Obviously, you will want to hand wash the onsies in cold water and let them line dry or tumble-dry on low or no heat in your dryer. This will preserve the quality of your iron-on transfer and avoid any cracking, or loosing any of your tulle pieces. The nice thing about knotting each one separately, is that if one tulle piece falls off, then it's only ONE! And you can easily med it (or leave it if you made your tutu full enough!) without having to sew a whole line of tulle pieces back onto your onsie.
Enjoy! Happy sewing! Pin It
Too cute! I absolutely love them. Too bad I'm not having a girl otherwise I'd be going crazy making stuff for her! So I guess it's a good thing I'm having a boy right now then, huh? Save myself some money I suppose!
ReplyDeleteThat is too cute. Too bad I couldn't sew, so I had to buy tutus at $80 a pop for you! You're so much more clever than I was, am.
ReplyDeleteMel those are beautiful, do you think I could make them for a size 4t? Thanks for sharing!
ReplyDeleteOh my gosh, you are a genius! So so darling!
ReplyDeleteBrittany-you totally could do them in a 4T... I'd get some gymnastic shorts and do the same thing along the waistband! Just make sure to adjust the length of the tulle to be longer than the shorts... then she can wear them with any top she wants. :)
ReplyDeletecan it be done with multiple colors of tulle
ReplyDeleteThank you! I've been looking for a tutorial for so long! This is very helpful!
ReplyDeletelooks like a bad email adrs
ReplyDeleteThis is a GREAT idea...genius really!! I want to add to this idea by saying that you CAN sew them on by machine....Simply find your machine's "Button Sew-On" feature and use it just like the hand stitch. This button sew-on program ties the thread off for you at the beginning, makes 6-8 horizontal stitches (you can adjust the width to your liking) and then finishes it off by tying another knot...Voila' done!!
ReplyDeleteThanks again!! I plan to make a gazillion of these for my new granddaughter <3
Jeanna