Wednesday, July 27, 2011

Astrid's Room!

IS DONE!

AAAH!  I'm so happy.  If you remember, a while ago I posted about Astrid's Bedding being done!  Well, now, her room is done too!

(Hear that little girl?  Your room is finished... you have your own space now... you can come out now.  
...seriously.)


So here are a few pics.

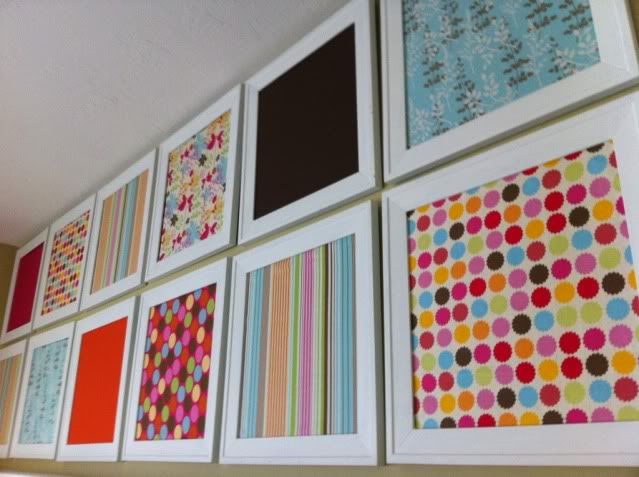
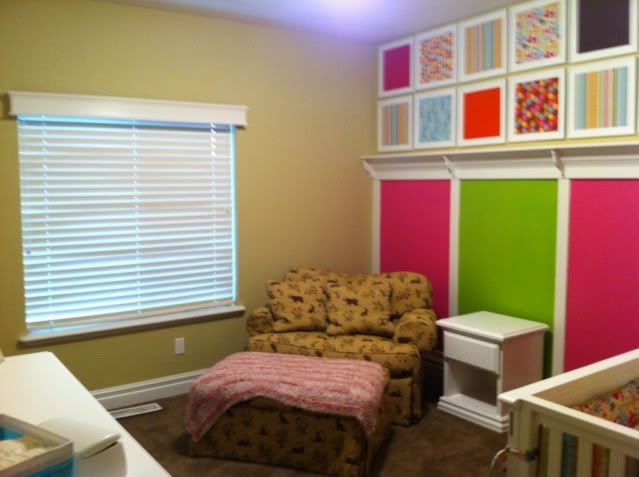
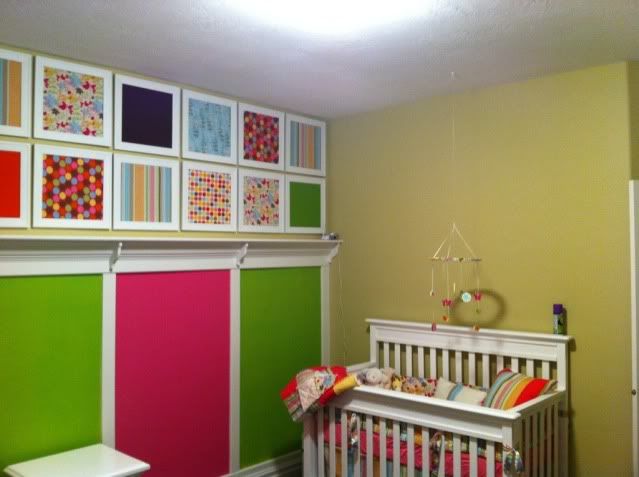
I pulled colors from her bedding to paint her "accent wall" and framed the fabric and some coordinating colors of her bedding to put over top of the painted rectangles.
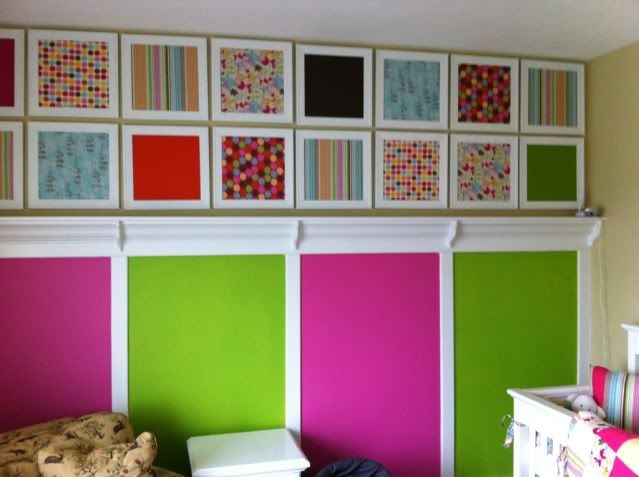
accent wall

The frames are pieces of cardboard with fabric that matches her bedding stretched over them and then framed.  Super Easy. :)

I swear that dark square isn't black-- it's brown. :)

The pink blanket is one that my friend Katie made!  She's so talented, I LOVE IT!


(please don't mind the can of "feline-away" on the crib.  lol.
We are training Mao that the crib is a no no place!)
I made this mobile by getting a wooden wreath frame and painting it to match her striped bedding.  The dangle-ies are made with wooden crafting circles of various sizes, that I painted to match the floral print.  I glued two of them together on the end of a ribbon and threaded the other end of the ribbon through the pre-made holes in the wreath frame. The butterflies are also wooden ones that I found that conveniently already had holes in them that I could just thread the ribbon through. :)  


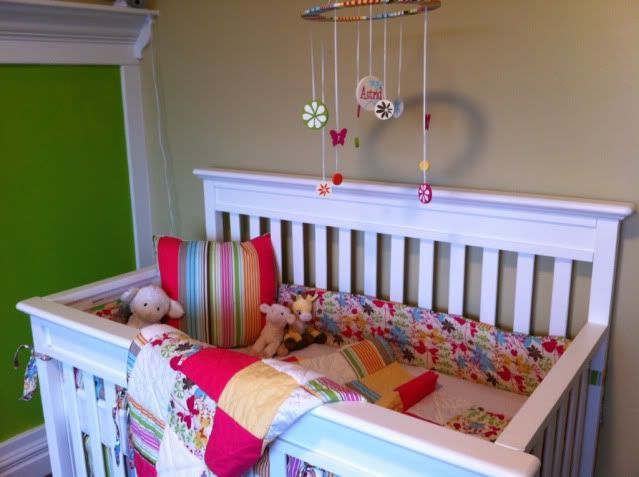
The bedding all done and in the crib finally! :)
We didn't like the dresser that went with the crib (or the $300 price tag!) so we picked one up on our local classified ads for 40 bucks!  It was black, so we had to sand it, paint it, and add new hardware, but I LOVE how it turned out. :) For a great tutorial on how to repaint a painted dresser... look here

The frame above the dresser is her bow board.  It's just a frame with fabric covered cardboard glued to it with ribbons stretched across taut to hold hair clips.  :)  I painted some clothespins white to hold all of her extra-headbands! Just clip onto the ribbon.


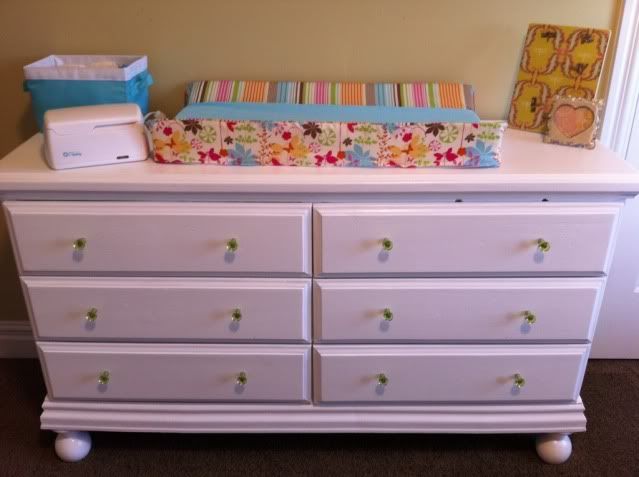
The cute picture frame on the right and the magnetic board behind it are from our good friend Susan Thompson.  She runs The Design House, and has a boutique with all sorts of cute stuff. :)  You can see her boutique HERE.

I LOVE the magnets on this magnetic board!  Cute bees and dragon-flies! :)
I need to get a picture of Mr. Marcus and Astrid to put in the frame...!

So there you have it friends.  Astrid's room... all done... finally.


(phew.)

Pin It

Monday, July 25, 2011

PSA of the Day

Dear Parents of Toddlers in Car Seats:

If your car seat is going to be out of the car for a few days or longer (and it's a crumb-filled mess from tossing french fries in the back seat to your toddler like mine is...) make sure that you put it ON something in your garage and not on the floor, because ANTS will find it and climb all over it.  It WILL be gross to clean and ruin your plans to go out that day since your seat will need to be de-constructed, sprayed, wiped down, and the cover will be spinning away in your washer.

Just so you know.

Love,
Melanie Pin It

Tuesday, July 19, 2011

My Jungle

I really need to weed my garden and mow our lawn.  It's a disaster...I'm sorry to my neighbors who have to see it... It's pretty bad.  Can I blame me NOT getting it done on being due in 2 weeks?  

...pretty please?
Pin It

Tuesday, July 12, 2011

Thrifty-Fun DIY: Make Your Own Nursing Cami

There are lots of things that I like to splurge on.  I will totally spend that extra five bucks for the big rolls of Charmin toilet paper vs. generic.  I will go to the fish monger at the grocery store and have him pick out my fish and wrap it up vs buying it pre-packaged and frozen.  I'd rather buy the Annie's Mac n Cheese than the Store Brand...

However... I do have a bit of a problem.  I WILL NOT buy something that I know I can make for cheaper at home.  I can't do it.  Especially when it is SO EASY to do yourself, and takes about 15 minutes.

When I first found out I was pregnant I was adding way too many items to my baby registry on amazon.com, and I found this super cool nursing tank top called "Undercover Mama".  Basically, it is a tank top without straps that attaches to your nursing bra, and it will turn any shirt into a nursing shirt.... See?


Well, It also retails on amazon for 25 bucks each.  I'm sorry... It IS a genius idea.  But I'm not spending 25 bucks on it...

**DISCLAIMER:  I AM NOT SELLING THIS IDEA.  JUST SHARING ON A PUBLIC BLOG FOR FREE.  SINCE THIS IS NOT MY IDEA, I AM NOT SELLING IT IN ANY WAY...**


Anyway, this is how you make one... 

YOU WILL NEED:
1 fitted camisole of your choice
1 spool of thread that matches your new camisole
1 hand needle
1 seam ripper
1 pair of scissors

+ + +

First, go to the store and buy a fitted cami of your choice.  I prefer the ones at Forever 21.  Their Basic Knit Tanks are great.  I love that they are long enough for you to layer but thin enough you don't feel like you are wearing a lot of extra fabric.  Plus, they are long enough to tuck in if you prefer.  The fact that their most expensive type is $3.80 totally helps my idea of them being the best too! :)  I got 2 in white, one in black, one in heather gray, and one in a cute white and tan stripe.  The idea is that you can wear them under any of your shirts, so all you have to do is lift up the top layer and the bottom layer (your nursing tank) keeps your torso from hanging out all over and allows the top layer (your shirt) to hide any boobage that might be exposed.

You want to make sure that your tank top's strap is perpendicular (that's my big word use of the day...) to the back of the tank top, so when the strap is removed in the next step, it doesn't look funny. 


see how the strap is perpendicular to the back of the top?
See?  See??

+ + +

Using a SEAM RIPPER carefully detach the back of the strap from the back of the tank top making sure you are only removing the stitching from the strap and not the hem of the top.


+ + +

Once your strap is detached, use your scissors and cut your strap so it is about two inches long from the front where it attaches to your cami.


+ + +

Loop it around and attach the end with your needle and thread.  Make sure that your stitches are secure, so go over it a few times.  I like to follow the pre-sewn line on the hem to camouflage my own stitching.


Repeat on the other side and you are done!  

When you are ready to wear, attach the loops to the clips of your nursing bra and throw on your top layer shirt.  When your babe is ready to nurse, pull up your top layer, unhook your bra and the loop, and nurse without showing the world your ta-tas and your exposed post-pregnancy muffin top.  When babe is finished, reattach the loop to the clip, and then pull your top layer back down. :)  


Easy Peasy.  And it only cost you $3.80.

Pin It

Monday, July 11, 2011

California Fun: July 4th weekend

We got to go to California for the weekend of July 4th!  It was so much fun to go and play on the beach and see Grandma and Grandpa!!  We had a blast... 

The first day we were there we took the ferry to Balboa Island and walked around.  We had lots of fun! :) 

So excited to See a firetruck! :)

Marcus watching the waves on the short ferry ride with Grandpa M.
Marcus and Grandma S on the Ferris Wheel

We went to eat cupcakes at Casey's Cupcakes Ever watch "Laguna Beach: The Real Orange County"? (ya... me either...) Well, a star from the show Casey Reinhardt opened this cute shop in Laguna, and her cupcakes are pretty dang good!)


Washing it all down with some chocolate milk...

We played at the playground at Main Beach...


And had a fun beach day!  Marcus LOVED playing in the sand and getting splashed by the waves!


Please pardon the big pregnant-ness of me in swimwear!  HA!
Pin It

Thursday, July 7, 2011

Craft Time! Baby Carseat Cover!

I am glad that we chose a unisex carseat... but I still wanted to "girlify" this one a bit.  I KNOW it's just a carseat, but in my head it's Marcus' carseat. Now it is getting passed down to Astrid, so I decided to make one of those groovy carseat tents that I've seen around.  They are pretty cool, and keep the sun out of baby's eyes, and let them have a dark place to sleep.  Plus, it keeps people away from touching your sweet babe with a brand-new immune system. :)

I LOVE this blog called "Make it Do".  It's filled with great tips and tutorials, and that is where I got this one.  It was so easy, I did it in about 2 hours from start to finish, including cutting, ironing, sewing and strap placement. :)  It's GREAT for a beginner sewer!  See the tutorial HERE -> Make it Do: Baby Car Seat Cover Tutorial.

Anyway, here is the carseat without the cover:


And Mr. Marcus enjoying it at three months old (Sorry, I just had to show off how dang tiny and cute he was... awwwww!) :


And here is the tent... I made it reversible! SUPER EASY!


And here is it on the inside:


Cute huh?!  Now go make one! :) Pin It

Tuesday, July 5, 2011

home again, home again

jiggity jig.

California was so much fun.  It was great to have a vacation and see some family before Astrid gets here.  I was a total slacker with my camera this trip... but luckily Stori is awesome and took a bunch.  I'll be sure to put them up ASAP. :)

Pin It

Friday, July 1, 2011

July!

For starters, I love July.  It is my favorite month.  It is the middle of the summer, the celebrations are awesome, peaches are delicious, watermelon is juicy.

I'm excited to start out July first with this view....


That being said, I have to say, yes.  We are on vacation for the weekend.  So excited.  However, because we are on vacation, I am blogging remotely... meaning that when I had to upload my spiffy new background to blogger (because it is, after all, the first of the month, meaning a new Jenson Jaunts theme...) my awesome patriotic banner got all downsized via photobucket.  Bummers for me and all of you who can not get the awesomeness of my blog design.  Suck.  I'll fix it on Monday night/ Tuesday when we get home.

Much love from the salt and the sand. Pin It