Showing posts with label Craft Time. Show all posts

Saturday, October 29, 2011

Halloween Warm-Up

We had our little family's "Pumpkin Party" tonight.

We had a Halloween inspired dinner and dessert (a la Pillsbury...aka, lazy mom dinner!) and we carved pumpkins!  We watched Hocus Pocus, a part of The Mummy Returns and "It's The Great Pumpkin Charlie Brown".  So much fun.  This year was the first that Marcus could really participate in our pumpkin carving.  He poked the little holes in his pumpkin all by himself.  So sweet.

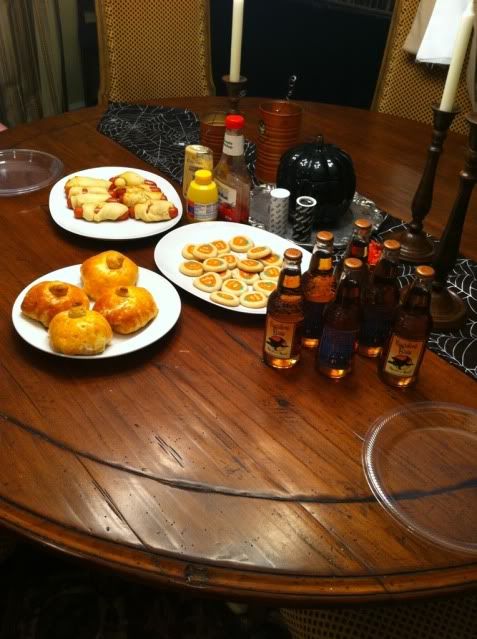
Here are some pictures of our yummy Halloween spread...

pumpkin shaped ham and cheese rolls, pumpkin sugar cookies,
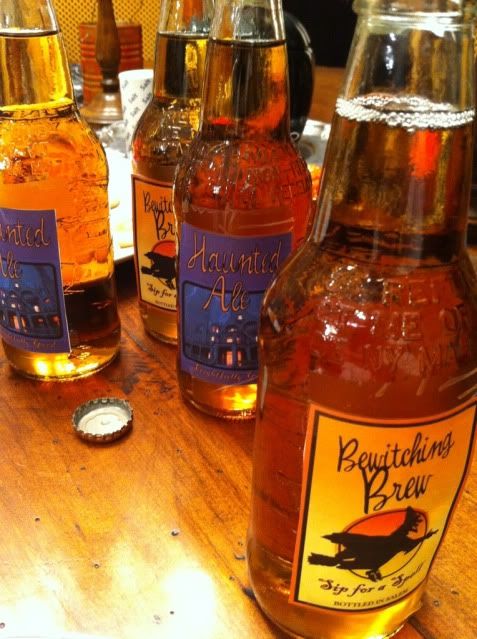
 mummy-dogs, and yummy cream soda

I got these cute labels online and taped them on.
Marcus was SO impressed. ;)


We Carved our pumpkins...Cooper's is a video-game inspired star man and a "happy happy cultist" from the game "Earthbound" (ya... I don't know who/what it is either. lol!), Marcus' is the Silly Face one, Astrid's is a kitty, and mine is the headless horseman! 


And sweet Astrid had SO MUCH FUN, she fell asleep early. 
Tired Pumpkin.

As you can see from our banner, this Halloween the family is dressing up as STAR WARS characters!  I'm so excited! Our costumes are all finished, and I can't wait to show you all of them. 

Hope you are ready for Monday!  We sure are!

Pin It

Wednesday, July 27, 2011

Astrid's Room!

IS DONE!

AAAH!  I'm so happy.  If you remember, a while ago I posted about Astrid's Bedding being done!  Well, now, her room is done too!

(Hear that little girl?  Your room is finished... you have your own space now... you can come out now.  
...seriously.)


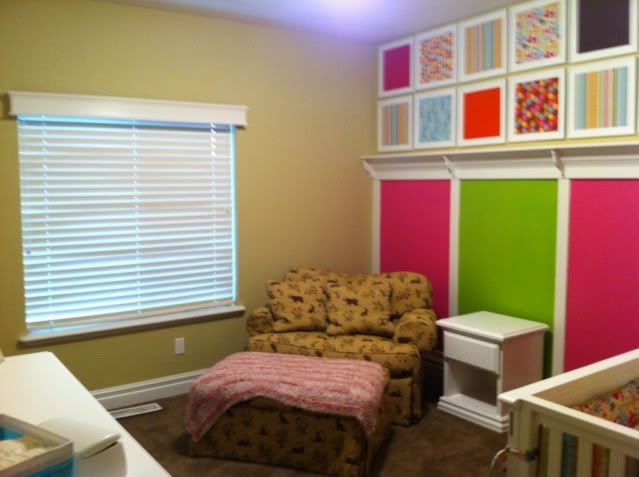
So here are a few pics.

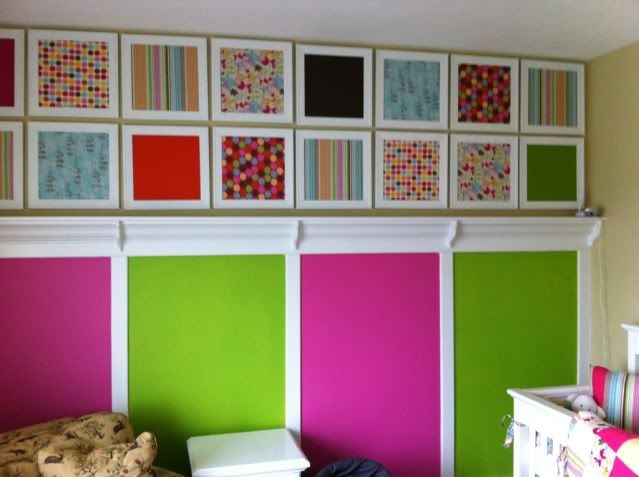
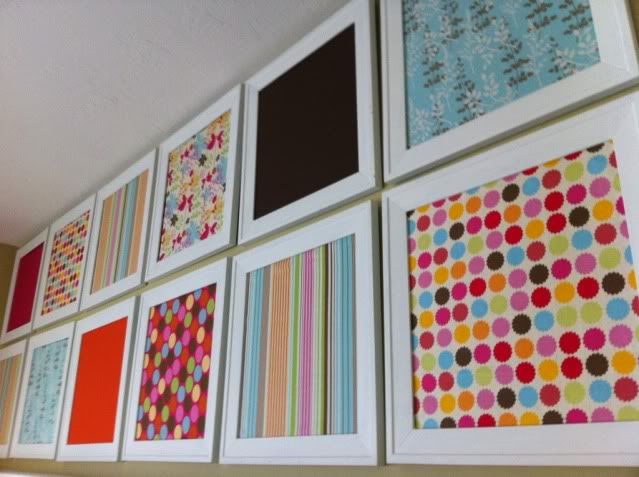
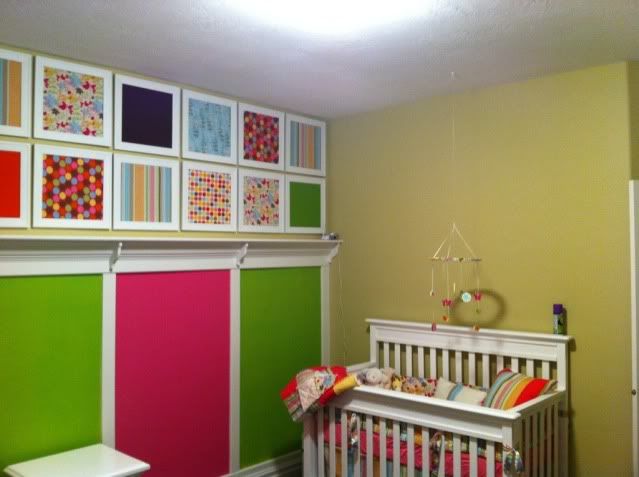
I pulled colors from her bedding to paint her "accent wall" and framed the fabric and some coordinating colors of her bedding to put over top of the painted rectangles.

accent wall

The frames are pieces of cardboard with fabric that matches her bedding stretched over them and then framed.  Super Easy. :)

I swear that dark square isn't black-- it's brown. :)

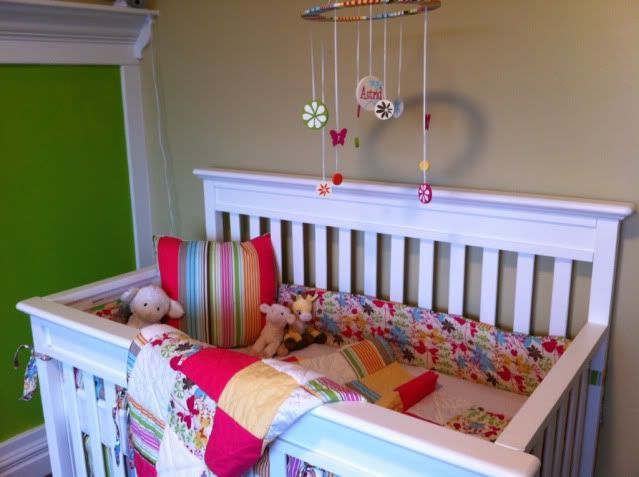
The pink blanket is one that my friend Katie made!  She's so talented, I LOVE IT!


(please don't mind the can of "feline-away" on the crib.  lol.
We are training Mao that the crib is a no no place!)
I made this mobile by getting a wooden wreath frame and painting it to match her striped bedding.  The dangle-ies are made with wooden crafting circles of various sizes, that I painted to match the floral print.  I glued two of them together on the end of a ribbon and threaded the other end of the ribbon through the pre-made holes in the wreath frame. The butterflies are also wooden ones that I found that conveniently already had holes in them that I could just thread the ribbon through. :)  


The bedding all done and in the crib finally! :)
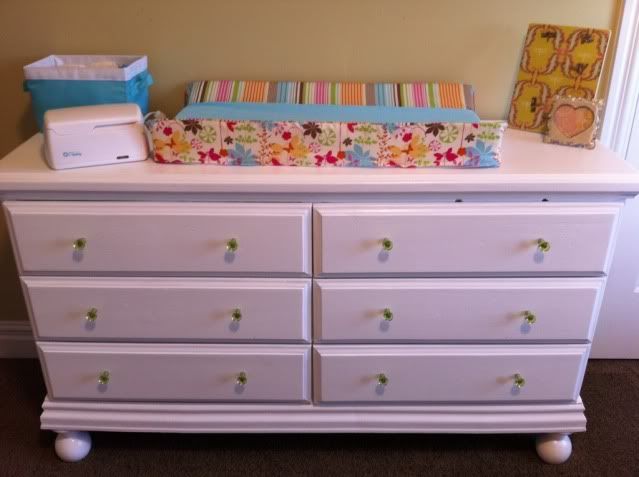
We didn't like the dresser that went with the crib (or the $300 price tag!) so we picked one up on our local classified ads for 40 bucks!  It was black, so we had to sand it, paint it, and add new hardware, but I LOVE how it turned out. :) For a great tutorial on how to repaint a painted dresser... look here

The frame above the dresser is her bow board.  It's just a frame with fabric covered cardboard glued to it with ribbons stretched across taut to hold hair clips.  :)  I painted some clothespins white to hold all of her extra-headbands! Just clip onto the ribbon.


The cute picture frame on the right and the magnetic board behind it are from our good friend Susan Thompson.  She runs The Design House, and has a boutique with all sorts of cute stuff. :)  You can see her boutique HERE.

I LOVE the magnets on this magnetic board!  Cute bees and dragon-flies! :)
I need to get a picture of Mr. Marcus and Astrid to put in the frame...!

So there you have it friends.  Astrid's room... all done... finally.


(phew.)

Pin It

Tuesday, July 12, 2011

Thrifty-Fun DIY: Make Your Own Nursing Cami

There are lots of things that I like to splurge on.  I will totally spend that extra five bucks for the big rolls of Charmin toilet paper vs. generic.  I will go to the fish monger at the grocery store and have him pick out my fish and wrap it up vs buying it pre-packaged and frozen.  I'd rather buy the Annie's Mac n Cheese than the Store Brand...

However... I do have a bit of a problem.  I WILL NOT buy something that I know I can make for cheaper at home.  I can't do it.  Especially when it is SO EASY to do yourself, and takes about 15 minutes.

When I first found out I was pregnant I was adding way too many items to my baby registry on amazon.com, and I found this super cool nursing tank top called "Undercover Mama".  Basically, it is a tank top without straps that attaches to your nursing bra, and it will turn any shirt into a nursing shirt.... See?


Well, It also retails on amazon for 25 bucks each.  I'm sorry... It IS a genius idea.  But I'm not spending 25 bucks on it...

**DISCLAIMER:  I AM NOT SELLING THIS IDEA.  JUST SHARING ON A PUBLIC BLOG FOR FREE.  SINCE THIS IS NOT MY IDEA, I AM NOT SELLING IT IN ANY WAY...**


Anyway, this is how you make one... 

YOU WILL NEED:
1 fitted camisole of your choice
1 spool of thread that matches your new camisole
1 hand needle
1 seam ripper
1 pair of scissors

+ + +

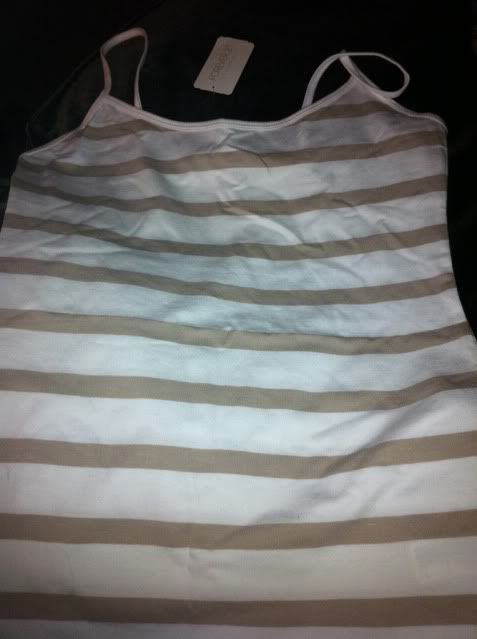
First, go to the store and buy a fitted cami of your choice.  I prefer the ones at Forever 21.  Their Basic Knit Tanks are great.  I love that they are long enough for you to layer but thin enough you don't feel like you are wearing a lot of extra fabric.  Plus, they are long enough to tuck in if you prefer.  The fact that their most expensive type is $3.80 totally helps my idea of them being the best too! :)  I got 2 in white, one in black, one in heather gray, and one in a cute white and tan stripe.  The idea is that you can wear them under any of your shirts, so all you have to do is lift up the top layer and the bottom layer (your nursing tank) keeps your torso from hanging out all over and allows the top layer (your shirt) to hide any boobage that might be exposed.

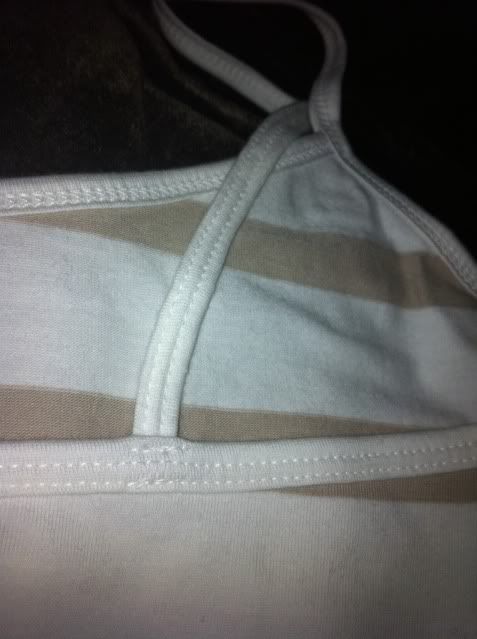
You want to make sure that your tank top's strap is perpendicular (that's my big word use of the day...) to the back of the tank top, so when the strap is removed in the next step, it doesn't look funny. 


see how the strap is perpendicular to the back of the top?
See?  See??

+ + +

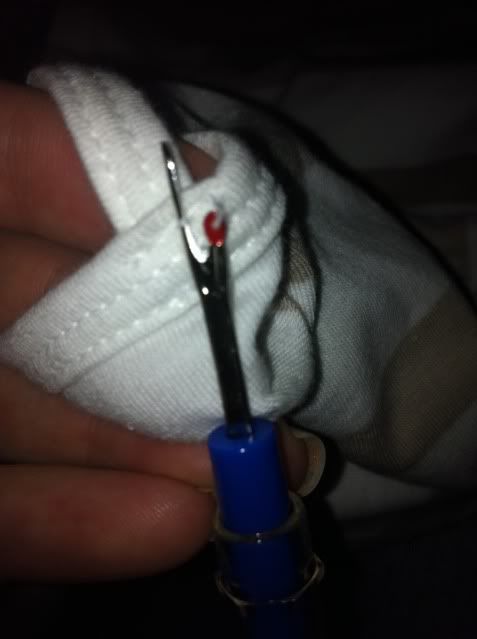
Using a SEAM RIPPER carefully detach the back of the strap from the back of the tank top making sure you are only removing the stitching from the strap and not the hem of the top.


+ + +

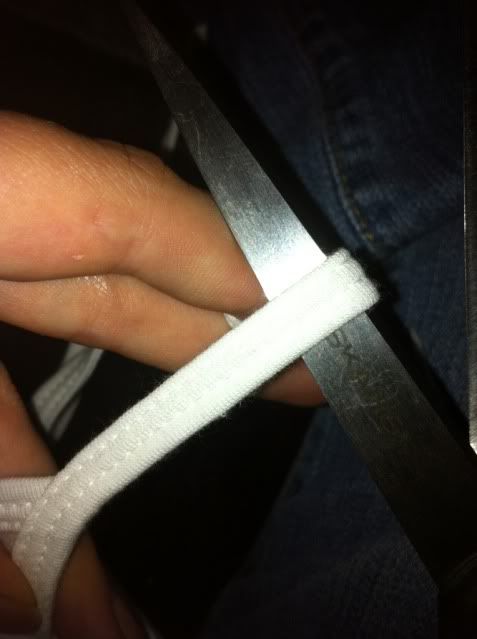
Once your strap is detached, use your scissors and cut your strap so it is about two inches long from the front where it attaches to your cami.


+ + +

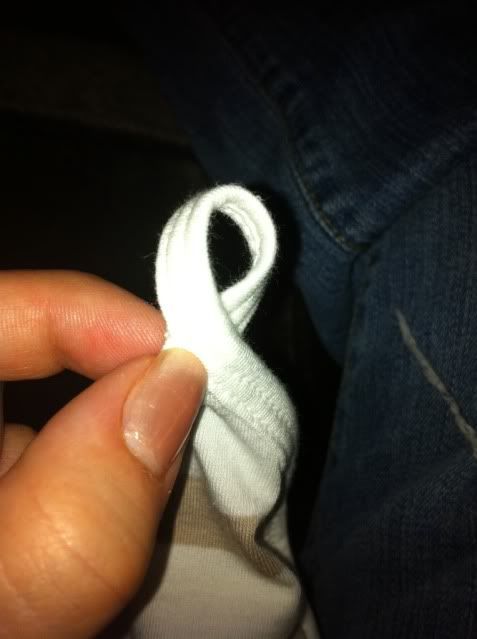
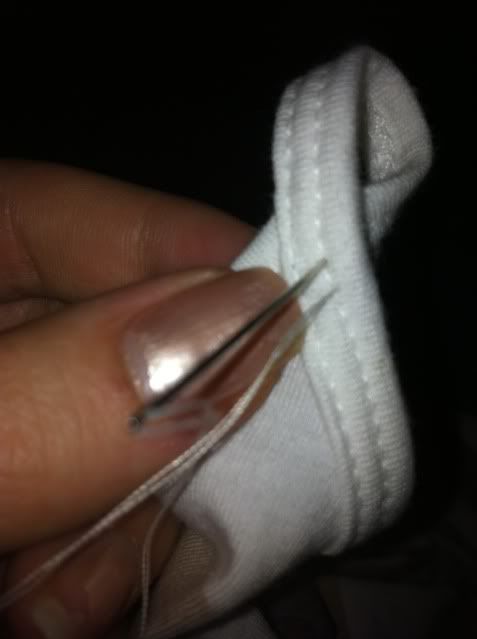
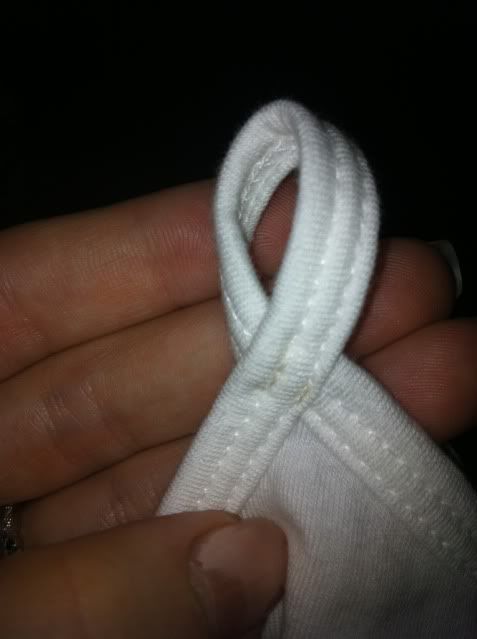
Loop it around and attach the end with your needle and thread.  Make sure that your stitches are secure, so go over it a few times.  I like to follow the pre-sewn line on the hem to camouflage my own stitching.


Repeat on the other side and you are done!  

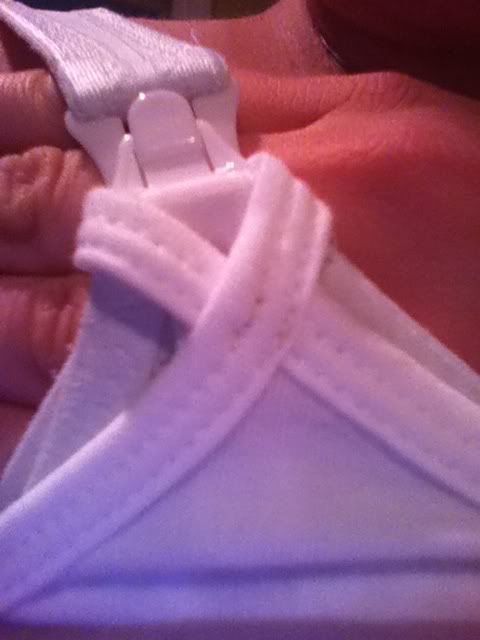
When you are ready to wear, attach the loops to the clips of your nursing bra and throw on your top layer shirt.  When your babe is ready to nurse, pull up your top layer, unhook your bra and the loop, and nurse without showing the world your ta-tas and your exposed post-pregnancy muffin top.  When babe is finished, reattach the loop to the clip, and then pull your top layer back down. :)  


Easy Peasy.  And it only cost you $3.80.

Pin It

Thursday, July 7, 2011

Craft Time! Baby Carseat Cover!

I am glad that we chose a unisex carseat... but I still wanted to "girlify" this one a bit.  I KNOW it's just a carseat, but in my head it's Marcus' carseat. Now it is getting passed down to Astrid, so I decided to make one of those groovy carseat tents that I've seen around.  They are pretty cool, and keep the sun out of baby's eyes, and let them have a dark place to sleep.  Plus, it keeps people away from touching your sweet babe with a brand-new immune system. :)

I LOVE this blog called "Make it Do".  It's filled with great tips and tutorials, and that is where I got this one.  It was so easy, I did it in about 2 hours from start to finish, including cutting, ironing, sewing and strap placement. :)  It's GREAT for a beginner sewer!  See the tutorial HERE -> Make it Do: Baby Car Seat Cover Tutorial.

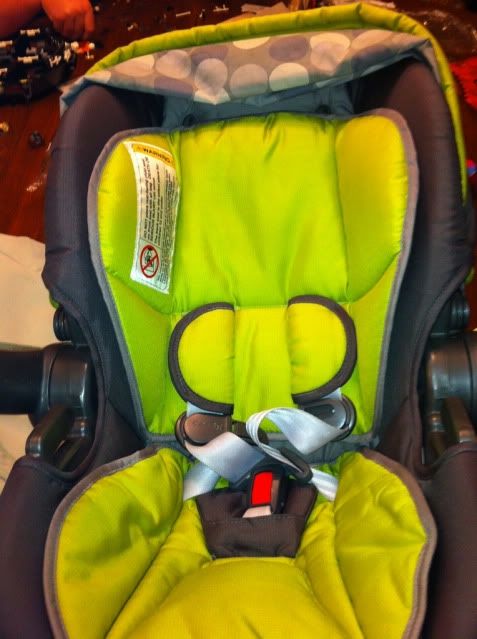
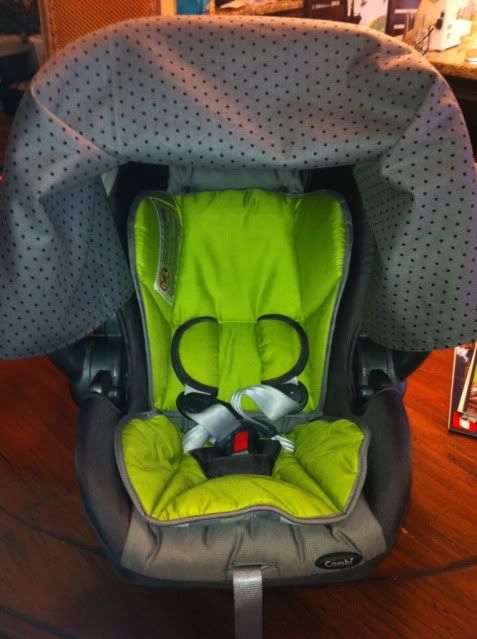
Anyway, here is the carseat without the cover:


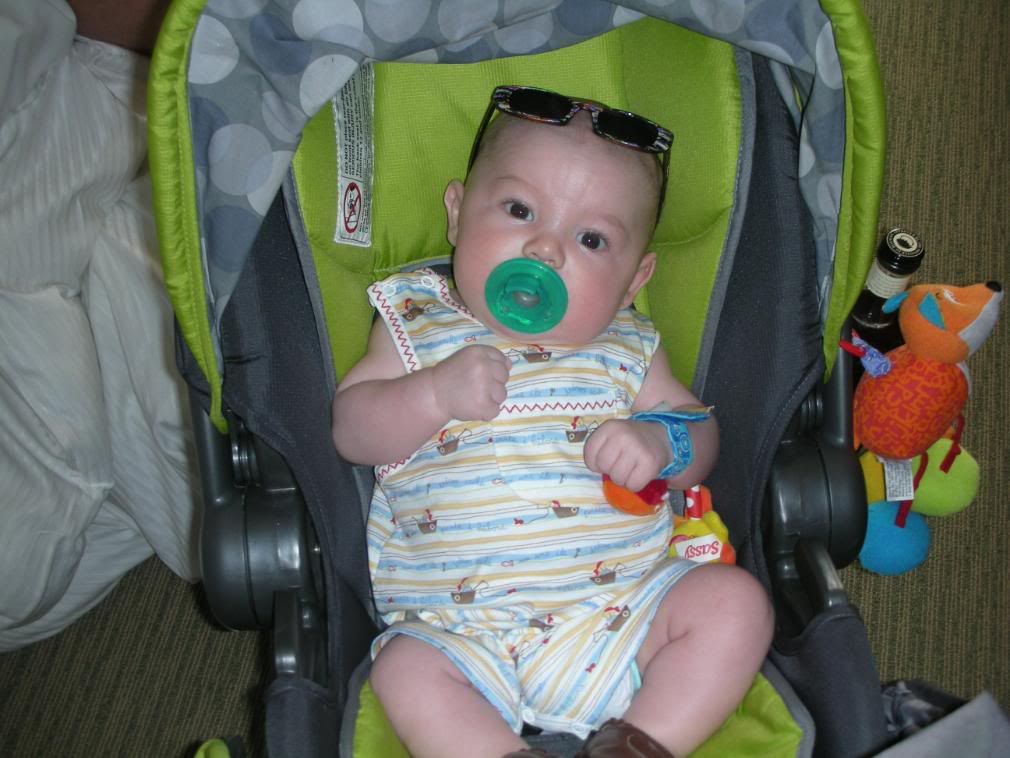
And Mr. Marcus enjoying it at three months old (Sorry, I just had to show off how dang tiny and cute he was... awwwww!) :


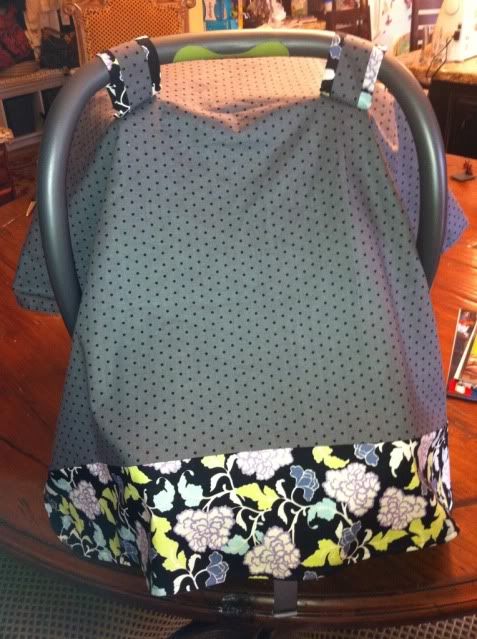
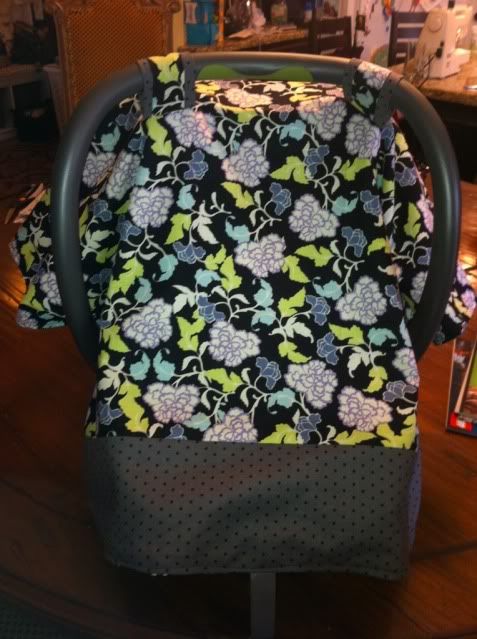
And here is the tent... I made it reversible! SUPER EASY!


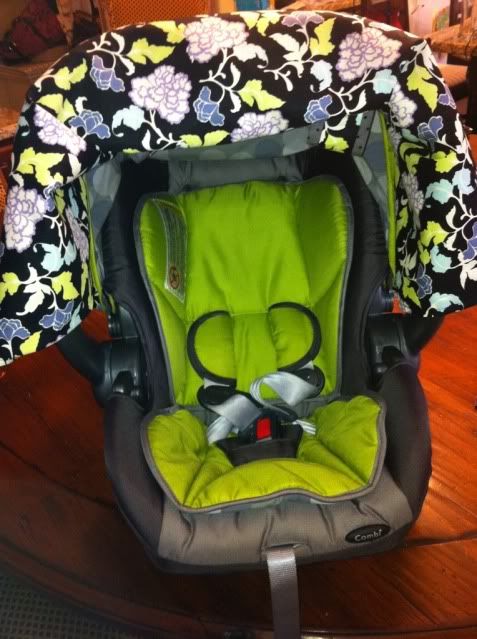
And here is it on the inside:


Cute huh?!  Now go make one! :) Pin It

Wednesday, May 25, 2011

Monday's Child Poem Onsies


Weeks ago, I promised a "tu-tu"orial here on The Jaunts.  Well, life has caught up to me, after being busy with Easter, and a sick kiddo and various other pop-ups I have FINALLY finished it!  :)  So... Here you go.


I've always said that when I have a little girl, she will dress up in tutus Every. Single. Day.  I love tutus on little girls, and so I am in HEAVEN that they are so popular right now! :)  I was thinking about how dang easy it is to make a tutu, and was going to whip up a few... and onsies with tutus sewn on are just the cutest... ever.

So, I made little tutu onsies for every day of the week with a line from the "Monday's Child" Mother Goose Nursery Rhyme.

Monday's child is fare of face, 
Tuesday's Child is full of grace, 
Wednesday's Child is full of woe, 
Thursday's Child has far to go, 
Friday's Child is loving and giving, 
Saturday's Child works hard for a living, 
but the child who is born on the Sabbath Day, 
Is bonny and blithe and good and gay.

Well.... I didn't want those EXACT lines on my sweet girl's tutu onsie!  (Who wants to put that their child is full of woe on their shirt!?) So I changed them up a bit, and made up my own version:

Monday's Child is full of grace, Tuesday's Child has a pretty face,
Wednesday's child has no woe,
Thursday's child has lots to grow,
Friday's child is loving and giving,
Saturday's child plays hard for a living,
Sunday's Child is fair and wise.

 For these tutus, I didn't like the idea of having elastic around her waist, and I wanted them to still be comfortable enough that when she is lying down (and lets face it, babies lie on their backs stomachs a whole bunch!) that she does not have uncomfortable knots on her back/tummy.  When your tutu is done, you can press your hand on the inside of the tutu and feel that it will be pretty comfy for your little girl to wear.   

This really is an easy thing to do, and you can make one single onsie, or a whole mess of them.  Plus, you don't even have to pull out a sewing machine.  I think this is also a cute way to personalize a baby shower gift, just print off an initial of your recipient's little girl, flip it on the computer and print it on your iron-on transfer sheet and follow the same directions.  I'm sure it would be a very welcomed gift, plus hold a special place in momma's heart because it was personalized from YOU! :)

If you can make a single stitch and tie a knot, you can make these onsies!


So.  First off, you are going to need:
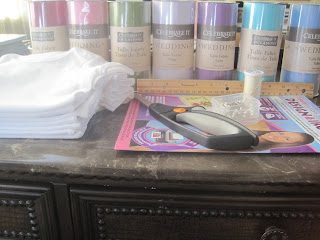
7 spools of Tulle.  I got mine from the craft store's wedding section.
7 white onsies in the size you need
1 spool of white thread
1 hand-needle
1 12 inch ruler
Iron-On fabric transfer sheet
Iron
Scissors
Fabric Marker


You will also need to download the PDF that I made for the Iron-On transfer sheets.  You can do that here:
Monday's Child Poem Onsies PDF File or make one of your own.  Just remember to print them off in a flipped (or mirrored) image so it looks backwards on the page when its all printed on the transfer paper.  Otherwise, it will look backwards on your onsie once it is ironed on!

Once you have all of your supplies, print off your iron-on transfer sheet (again, you can do that here.) and cut out your transfers.  Make sure to read the directions on your transfer paper and allow for the appropriate edge around where you are cutting.


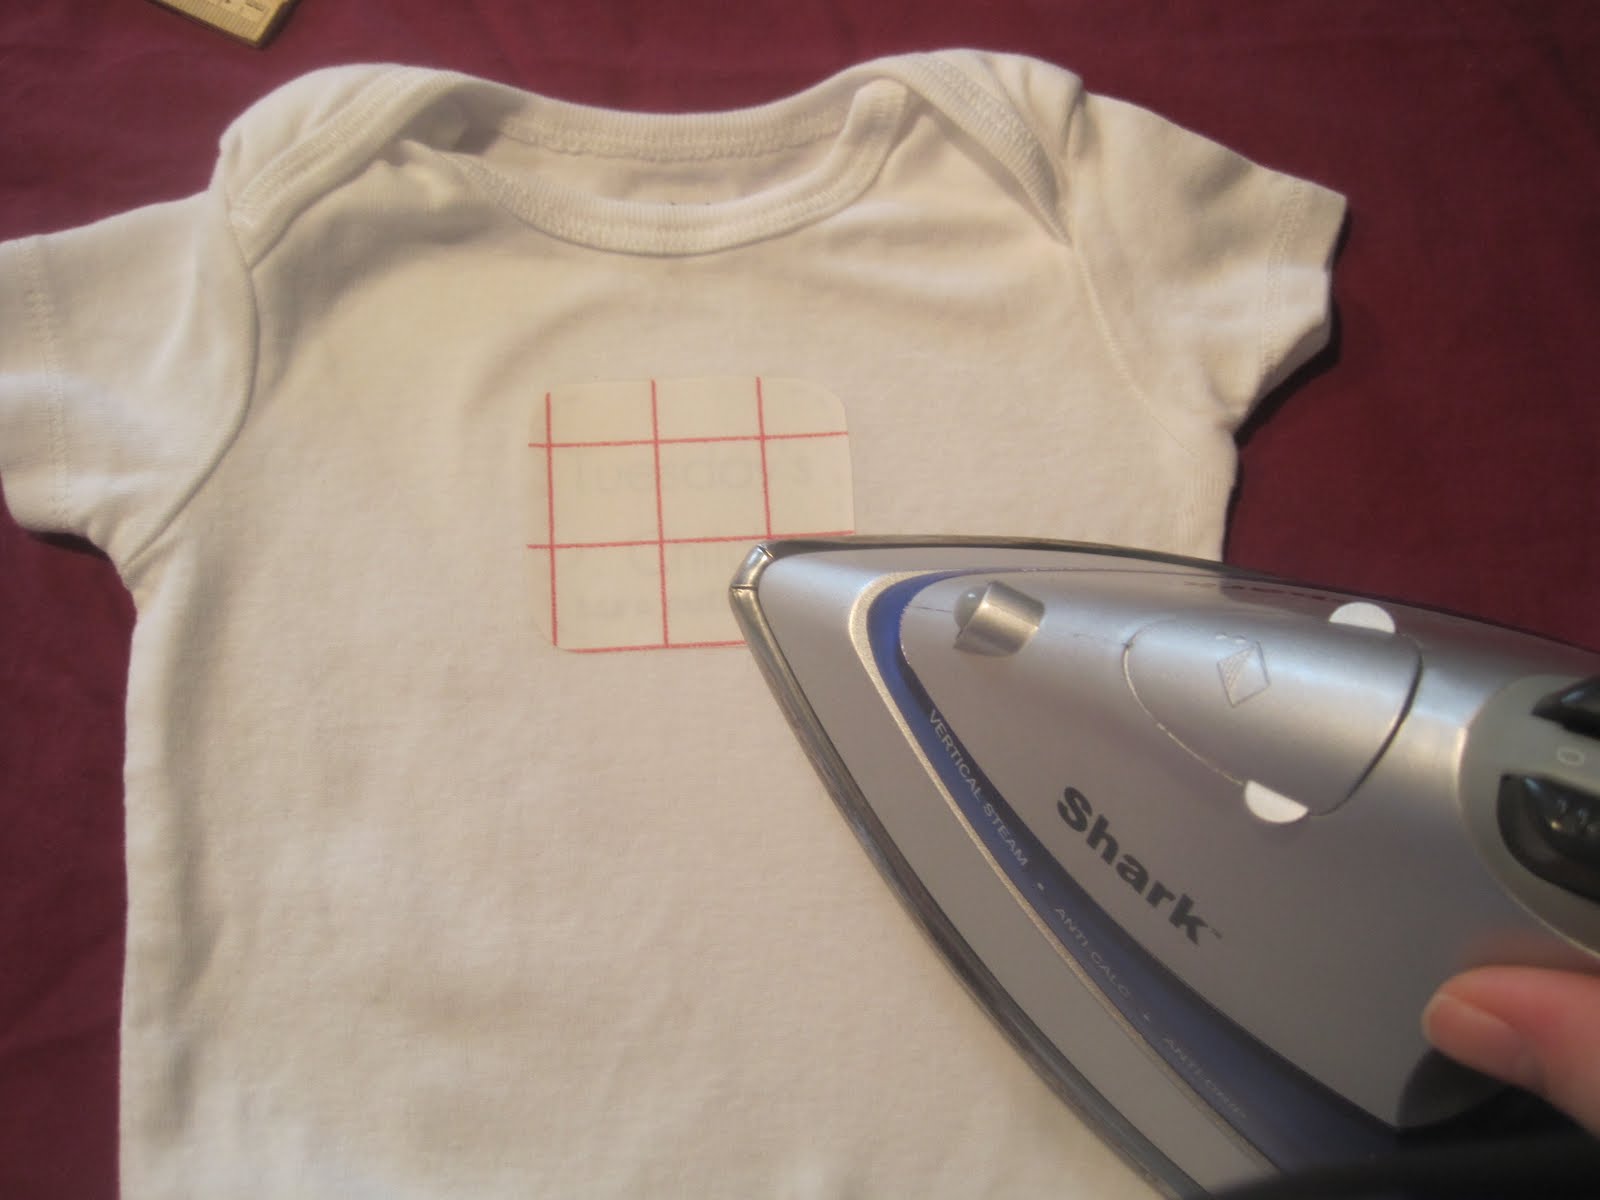
Following the directions for the transfer sheets, iron on the transfer paper to the onsie front, making sure that it is centered.  I folded mine in half, then marked the middle with the fabric marker, centered the iron-on, and then ironed on high dry heat.


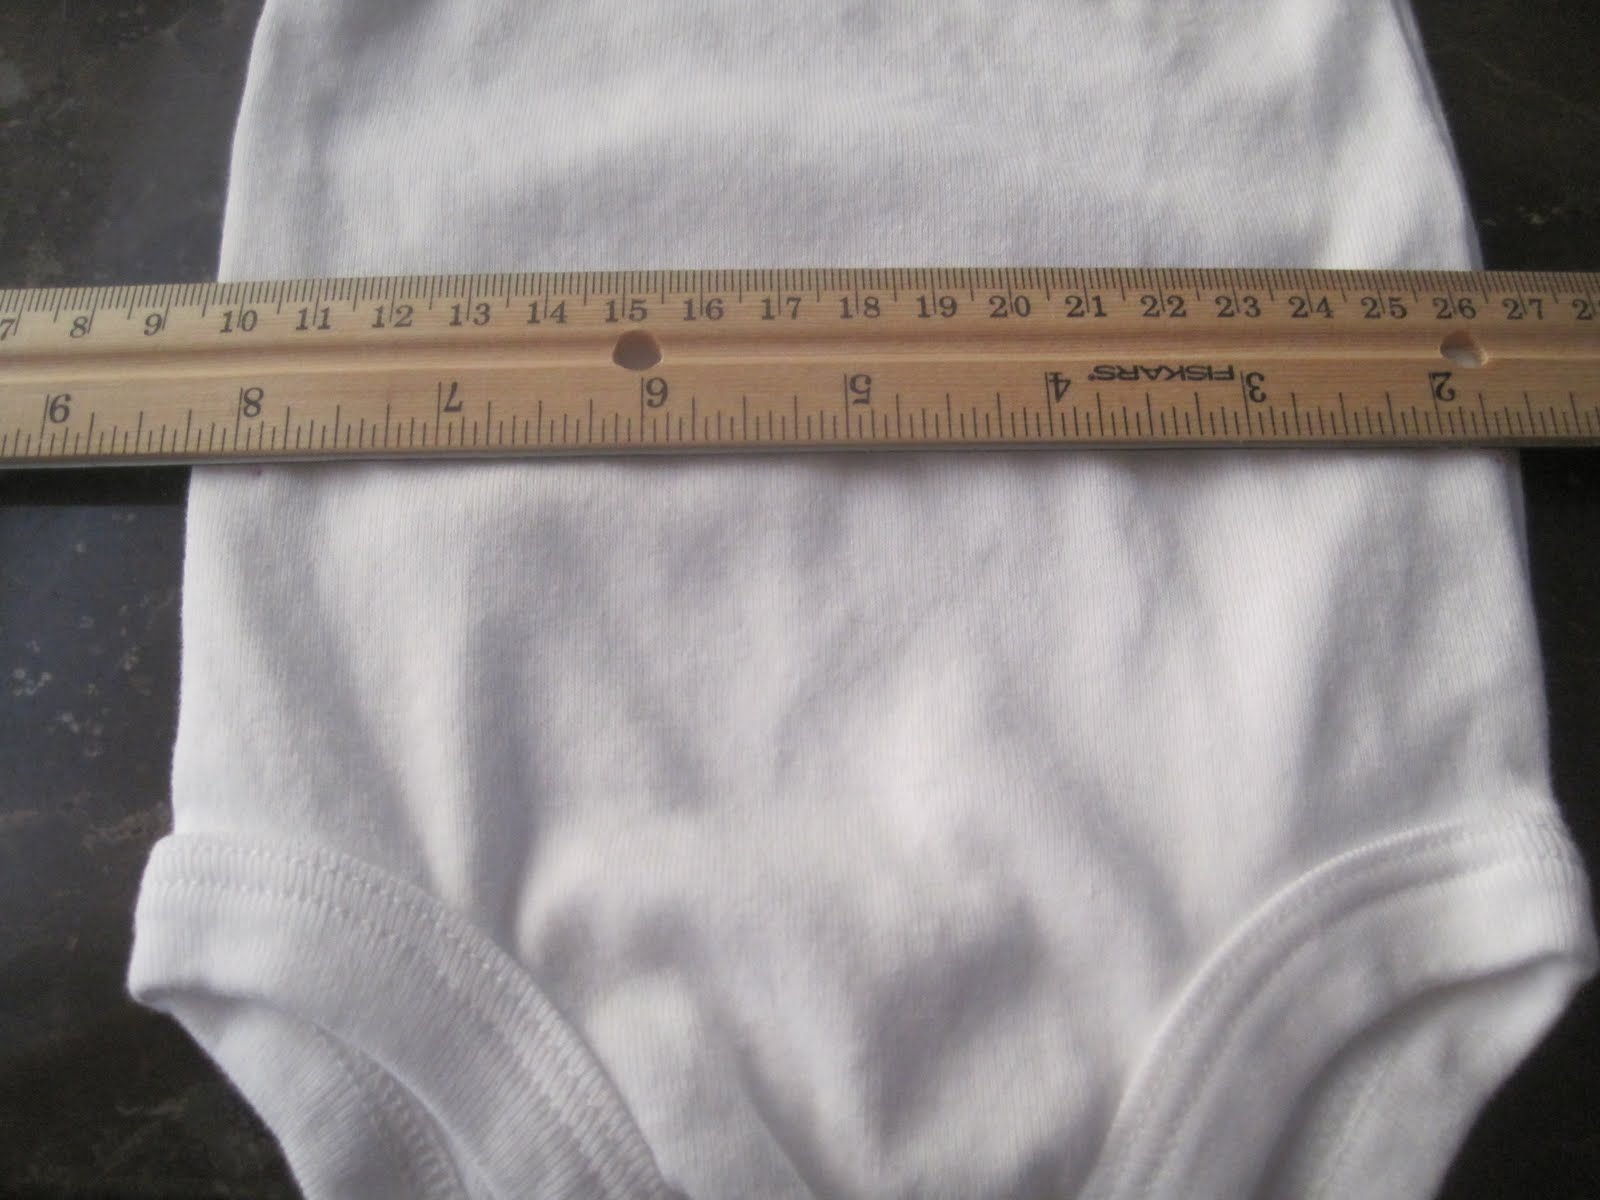
Once your onsies are all finished and have the transfer on the fronts, use your ruler to measure up 2 " from the waist of the onsie leg, about where your baby girl's diaper line will be.  Then make little dots all across the onsie for guidance when you are sewing on the tutu.


Next, you need to measure out many many many many many feet of tulle!  I used my ruler and wrapped the tulle around it over and over again (almost using up the whole roll of tulle, I probably use between 50-70 feet of tulle for each onsie.  Don't worry, there are 25 yards of tulle on each spool. You will even have some extra for some matching headbands if you wanted!) until you have a good "chunk" of the tulle rolled onto the ruler.  Then snip both ends so you have many, many, 12-inch sections.


No, you could just fold each section in half, but I prefer to fold the tulle diagonally first and then find the middle to sew on.  It makes for a bit fuller of a tutu. Find the middle of your tulle section, pinch, and sew onto your onsie by putting your needle through the fabric from the underside, looping it around the middle of your tulle, and then sending your needle back to the inside of your onsie.


Then knot it off and snip off the excess thread.  This part is very time consuming to knot each one.  BUT, by knotting off each one vs. sewing them all on in a big row makes it so the onsies keep their horizontal stretch, so they will wear longer.


Repeat again and again until your onsie is full of tulle all the way around!


Then, repeat for all seven onsies to have a complete set.  When done, your little girl will be able to wear a onsie EVERY day of the week! :)


Obviously, you will want to hand wash the onsies in cold water and let them line dry or tumble-dry on low or no heat in your dryer.  This will preserve the quality of your iron-on transfer and avoid any cracking, or loosing any of your tulle pieces.  The nice thing about knotting each one separately, is that if one tulle piece falls off, then it's only ONE!  And you can easily med it (or leave it if you made your tutu full enough!) without having to sew a whole line of tulle pieces back onto your onsie.

Enjoy!  Happy sewing! Pin It